Saturday, August 14, 2010

Toronto Wedding Photographer: Nikon D3s vs Nikon D3 for Low Light Weddings

We've all seen plenty of reviews on noise comparisons between these two cameras, or a Canon 5D MKII vs a D700, etc., etc. However, more often than not, the test results posted are simple shot comparisons of the same image side by side, with the camera set on a tripod. You know what I am talking about, as a working wedding photog, we just want to see these tools working in real life conditions or worst case scenarios. What we are looking for is justification to drop another obscene amount of cash on yet another camera body, right? There's also the much cheaper alternative of renting, which is what I did at Vistek. For $225/weekend, you can have a state of the art D3s body to use as a second camera for the big day.

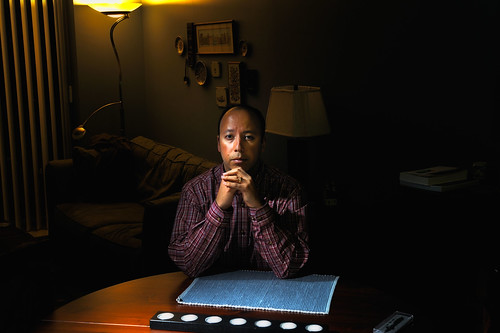
I thought I was set with my Nikon D3, and that the D3s only made sense as an upgrade if I were to get into video as well. Boy, was I wrong! You can bet I'll be renting that body more often from now on. The following images serve to illustrate the subtle but very key differences between pushing the limits of high ISO with a D3 and doing the same thing with a D3s. First of all, let me explain the case scenario here. The reception for this wedding was very intimate, and it was held at Oro Restaurant. The room where it took place was VERY dark, which was the reason that prompted me to rent the D3s upon finishing my scouting trip to the venue the week before. The couple wanted to keep the lighting mood of the room intact, so bouncing flash all over the walls was out of the question. It was up to Nikon to deliver on its promise of amazing low light performance:

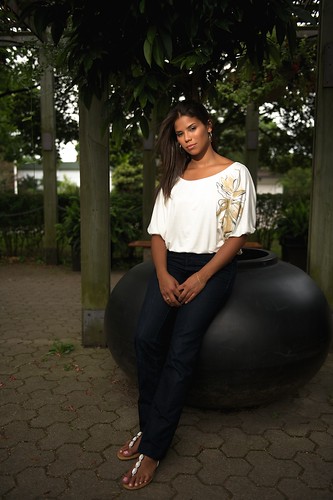
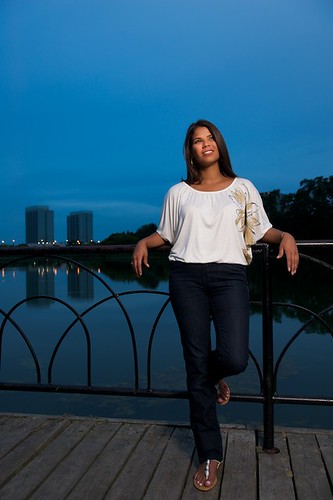
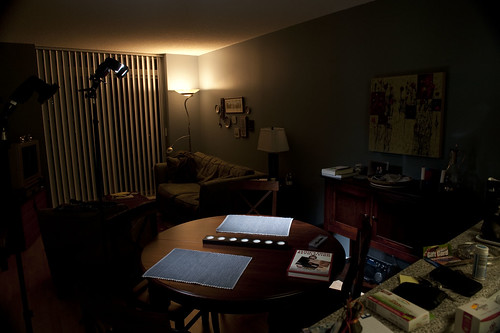
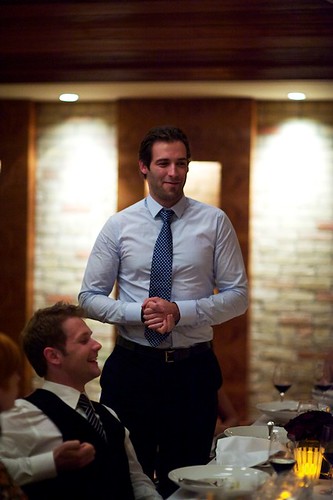
The following shot was taken with the D3s and it shows more or less what the real lighting conditions were there. Bear in mind, I had to set a negative exposure comp to bring the light down to these levels:
SAMPLE_D3_3
There's noise in the image, but you really can't see it unless you zoom in at 100%, which makes for a very usable image even at these levels.

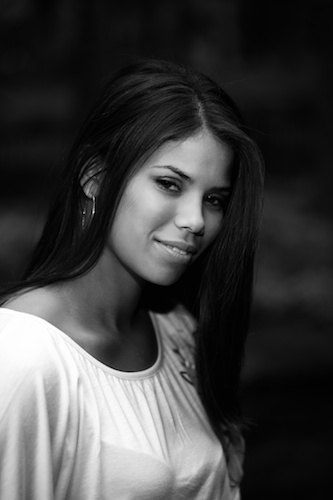
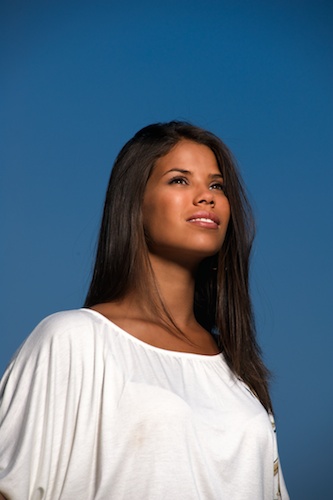
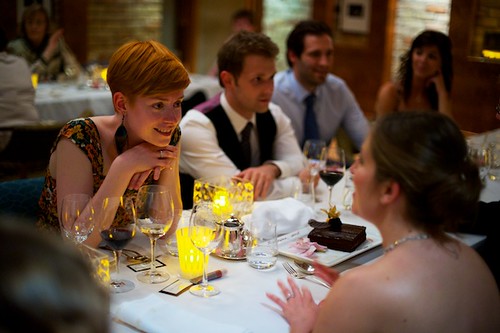
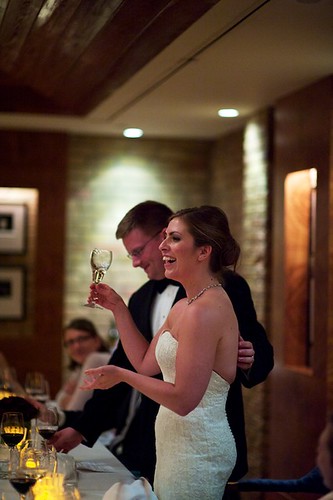
The D3s really shines in this shot, as the light reflecting on the face of the girl is coming from the small LED candles sitting in front of her. Again, a very usable shot when zoomed in at 100%:
SAMPLE_D3S_1

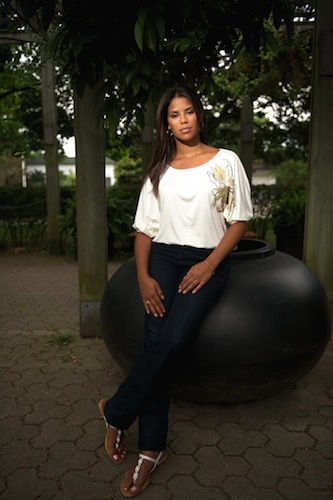
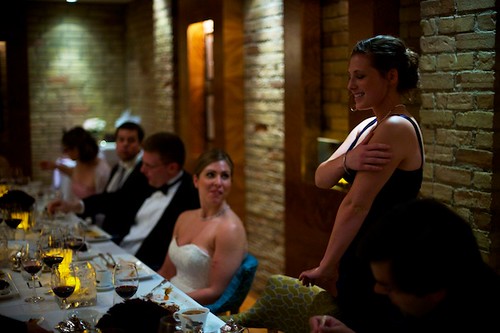
For this shot, I actually had to reduce the Exposure in Aperture in order to bring the light down, as even with the negative exposure comp set on camera, the D3s was essentially seeing more light than my eyes could.
SAMPLE_D3S_2

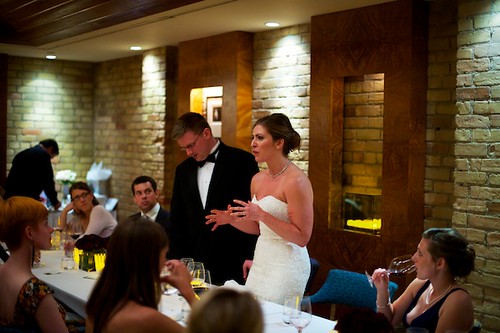
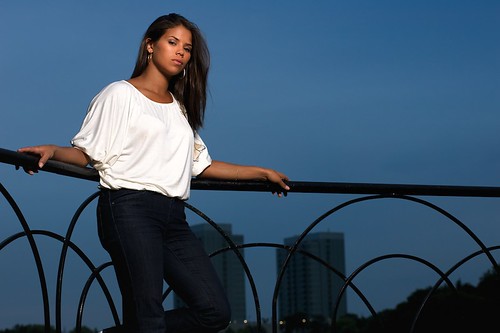
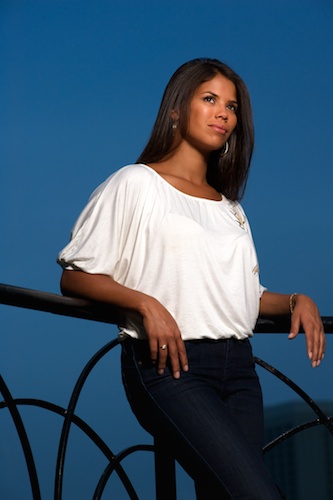
Now, the D3 was a trooper as well and during the reception after reviewing the shots in camera, I thought it had performed on par with the D3s at the same ISO level (6400). Well, the answer is yes and no. The noise level was very similar and I did get plenty of usable shots with my D3 but the subtle differences came later in post processing. At ISO 6400, the D3 images start to present a color degradation. In other words, things like skin tones don't look quite as warm or natural as with the D3s shots. Don't believe me? See for yourself, these shots were processed using the same editing preset in Aperture 3.0. Notice how the skin tones look slightly more pinkish/reddish (depending on the person's skin color).

SAMPLE_D3_2

SAMPLE_D3_1

In conclusion, is the D3s superior to the D3 in high ISO performance? The answer is a resounding YES!

Friday, August 13, 2010

Toronto Wedding and Portrait Photographer: Nikon SB-900 with 1/8 HONL Speed Grid

As promised, here are some of the shots taken with the HONL 1/8 Speed Grid, attached to an SB-900. The speed grid serves no other purpose than to concentrate the beam of light to create more dramatic lighting, as opposed to spilling light everywhere. In these photos, the speedlight was aimed at the model's face, the ambient light was reduced and the flash was set to TTL with a flash exposure comp of -0.7. The SB-900 was triggered using an SB-800 on camera.

Portrait Session at High Park 2

Portrait Session at High Park 7

Portrait Session at High Park 6

Toronto Portrait Photographer: Alien Bees B1600 with Beauty Dish

The shots in this post were taken at High Park in Toronto. I was commissioned for a portrait session about a month ago, and decided to follow the old adage: "Better bring it and not need it than need it and not have it" regarding equipment. Bringing a Kata bag with two strobes, a Vagabond II battery and several stands, along with a foldable octabox and beauty dish requires a certain level of fitness to carry around a park, one that I certainly didn't have. I'm so glad I dragged that stuff around through, because the results were quite pleasing. The following shots were done using a B1600 attached to a 22" beauty dish with a difusser sock over it. The strobe was triggered using Pocket Wizards, and the power was set at 1/8 power for most of them. In my next post I'll put some pictures up of the shots that were done using an SB-900 with a HONL speed grid, which are ideal for creating dramatic lighting.

Portrait Session at High Park 3

Portrait Session at High Park

Portrait Session at High Park 5

Portrait Session at High Park 4

Wednesday, July 28, 2010

Toronto Wedding Photographer: Jack & Helen's Esession in Downtown Toronto

Here's a slideshow from Jack and Helen's Engagement Session in Downtown Toronto. The journey started at Brookfield Place, then we moved on to Union Station and from there we walked over to the Skywalk, finishing off at Toronto's Harbourfront.

Monday, January 4, 2010

Dramatic Lighting Using the HONL Grids and Nikon's CLS

Imagine if you came home and this was the scene waiting for you. You don't know who this person is, but he clearly knows who you are, and took the time to carefully break into your apartment, and now is waiting for you at your table.

Waiting for You

The idea here is simple, the dramatic mood of the scene is provided courtesy of some dramatic lighting, which was created with the help of HONL's Speed Grids. I had both Speedlights (SB-900 and SB-800) placed at camera left. The SB-900 had the 1/8 speed grid on and was pointed down at the subject, and set to -1.7EV via the on-camera SB-800. The SB-800 had the 1/4 speed grid on and was pointed at the table, set to -2.3EV, just enough to see a bit of the table. You can see the setup shot here:

Setup of Waiting for You

The RAW file was converted to TIF via Capture NX, with additional use of Nik's Color Efex Pro 3.0.